


A month I was offered the opportunity to try for the first time a NiMAR Underwater System with my Canon EOS 70D DSLR. I asked the NiMAR team to provide me with a Macro port to test it with my Canon 100mm so that I could leverage the cropped sensor for extra closeness for some macro shooting.
After many years of topside photography I started doing underwater work about 9 years ago as I moved to Dubai from Europe and this increased my realistic opportunities to get wet and find interesting subjects. I started with a low cost entry level solution that was at the time a polycarbonate transparent Ikelite system for my Canon 40D camera.
That was good to get started but also gave me few issues with leakage because the tightening system, particularly for the ports, was quite loose and the material felt fragile. So, once I upgraded to a more professional camera system and intensified my diving and photography, I also upgraded to a more top end housing system.
I now usually shoot underwater with a Canon EOS 5DSR in a Subal underwater system so I was curious to see how well could I work again with a more entry level system and compare it to my current experience.
When I received my NiMAR system I was immediately impressed with the attention to detail and customer care. I have always complained about the fact that really expensive housing companies don’t even bother to include port covers, o-ring removers or any little accessory to make the photographer life easier despite the big bill.
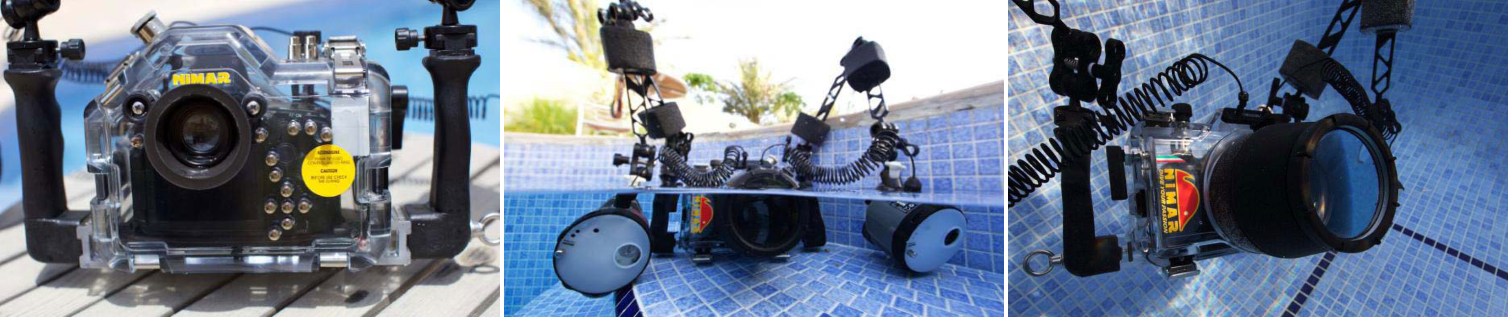
The NiMAR housing comes in a great padded soft bag to carry it and is accessorized with anything you may need: spare o rings, cleaning clothes, o-ring removers and different keys and mini screw drivers. So you are ready to go with no extras needed.
The housing very positively surprised me with its sturdiness and reliability. It is made of a thick transparent polycarbonate that feels very robust despite the material being in general more delicate than metal housings. The step change from my first housing memories is the NiMAR locking system: 4 large metal fasteners clip the back in place tightly and a bayonet lock system for the port provides very safe waterproofing down to 60meters. A leak alarm completes the security leaving leakage risk only up to the photographer’s human mistakes. The housing is also finely shaped around the camera, which makes it about as compact as metal housings, very important especially when carrying it on planes.
With such a good design the polycarbonate material looses the disadvantages and keeps only the benefit of seeing through the full camera that I always liked in my first system.
The other new experience for me was to try for the first time a fiber optic strobe connection. I normally use my Inon Z240 strobes with a sync cord as the 5DMark III has no built in flash to trigger fiber optic. The 70D with the NiMAR housing is perfectly designed for fiber optic connection. You just have to slide in the camera with the flash unlocked and fit the thin fiber optic cords in the designated holes in the front of the housing. The fiber optic cords get then connected to the optic triggers of the strobes all with easy wet connections.
This system requires half the setting up time and takes away the need for all the extra dry connections that could go wrong with sync cords. For Sync cord lovers or if you have strobes that cannot be run via fiber optic there is still an available cord connection head on top of the housing that links to the camera via an internal hot-shoe, allowing to connect an external TTL or one flash directly.
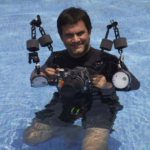
I was eager to get this new toy wet, so I first tried it in the pool also to familiarize with the handling and the fiber optic lighting system.
The housing was immediately really easy to use and all controls very responsive. Some of my pool “wildlife” shots were quite successful right away. I tried to shoot in TTL with the fiber optic and I find the images were slightly underexposed vs. my manual setting but nothing that a bit of brightening in post-production could not fix.
The housing allows to access nearly all functionalities with a couple of small exceptions as it is not possible to operate the back wheel control of the camera nor access the “AF” and “drive” direct setting buttons on the top right. This was a design choice not to clutter the back as the Canon DSLRs have a very useful “Q” button in the back that allows to select any setting from the menu via the arrow controls and then change them via the top wheel. As I started using the menu and the Q button I found myself loving the simplicity of managing settings this way and the transparent hosing makes it really easy to look through the camera display.
It is also not possible to operate the ON/OFF camera switch so you have to remember to get your camera in already switched ON. In any case with the basic practice of taking at least a test photo after assembling the system at home it will be immediately evident if one forgot to switch it on.
So it was finally time for the real test out on a dive. As I said I live in Dubai and just a couple of hours drive from the city you can reach some lovely dive sites on the UAE East Coast that faces the Indian Ocean. So I booked a day trip to dive Inchcape 1 and 2 in Fujairah, two small wrecks sunk about 15 years ago that have developed into quite rich underwater environments. Not the Lembeh Strait but some good macro life for a camera test.
Inchcape1 is a deep dive at 30 meters with limited bottom time to about 25 minutes and my mask was fogging constantly so I got to try the housing in torture test conditions. The housing proved really easy to handle and friendly to operate despite my lack of experience with it. I used manual strobe settings, as those are easy to set for macro and managed to get some quite nice shots of a lovely seahorse and some cute catfish that were hiding between parts of the wreck. The housing is slightly positively buoyant and that was a very welcome relief while holding the housing in one hand and cleaning my mask with the other, repeatedly.
The second dive at Inchcape 2 was more relaxed as I sorted out my mask and we were only at 20 meters so I could enjoy a relaxed dive and testing the housing functionalities. I played around with settings with some of the many scorpion fish and small catfish moving around in a compact group confirming the really smooth operation of the housing. The NiMAR Macro port is also designed to attach a focus light on a slot on top of it that makes the focusing much faster and easier particularly at depth or for small subjects hidden in the corals or in dark areas.
I enjoyed the cropped sensor of the 70D giving extra magnification to my Canon 100mm macro lens. I usually have a Macromate wet diopter on my macro system to get extra magnification.
NiMAR just brought out some new flip lens holder system to add some wet lenses for supermacro and this will make this setup even more powerful to shoot really tiny subjects.
Net, I think this NiMAR system offers a great quality and value housing option as I could deliver the same images I would have gotten with my 3 times more expensive pro-system. I would definitely recommend it to someone taking the first steps into DSLR underwater photography and I would seriously consider it as a solution as a more experienced photographer.
 WORDS and PICTURES by Simone Caprodossi


