Many years ago when I started shooting underwater photography I fell under the “gear-spell” an ancient money-draining curse thrust upon the unassuming photographer that fools you into believing a beautiful image is the output of a camera and not the tiresome construction of an artist.
That is to say “an oven and not the chef” is responsible for an award winning meal. Over the years I have explored many camera options and have progressed from automatic settings through aperture and shutter priority modes all the way to manual settings with manual strobe settings, and yet reflecting on my best works and those of the underwater photographers around me, it becomes glaringly obvious that the beauty of these images is not the scientific combination of shutter and aperture but the image itself.
In fact it is only in the past few years that an image has ever been required to exhibit camera metadata settings to be accepted onto a photo sharing group.
 Despite high-end cameras becoming more affordable and arguably mainstream, many of the masses still seem to struggle capturing their dream shot.
In my years of teaching on the topic, more often and not this is blamed on settings or cameras limitations rather than getting back to basics and reminding ourselves that a brilliant underwater image is an art form and not a science.
So lets get back to basics and remind ourselves of all of the small things that when complimented with the right settings will deliver the a beautiful back-scatter-free photograph, with depth, colour and a sense of drama.
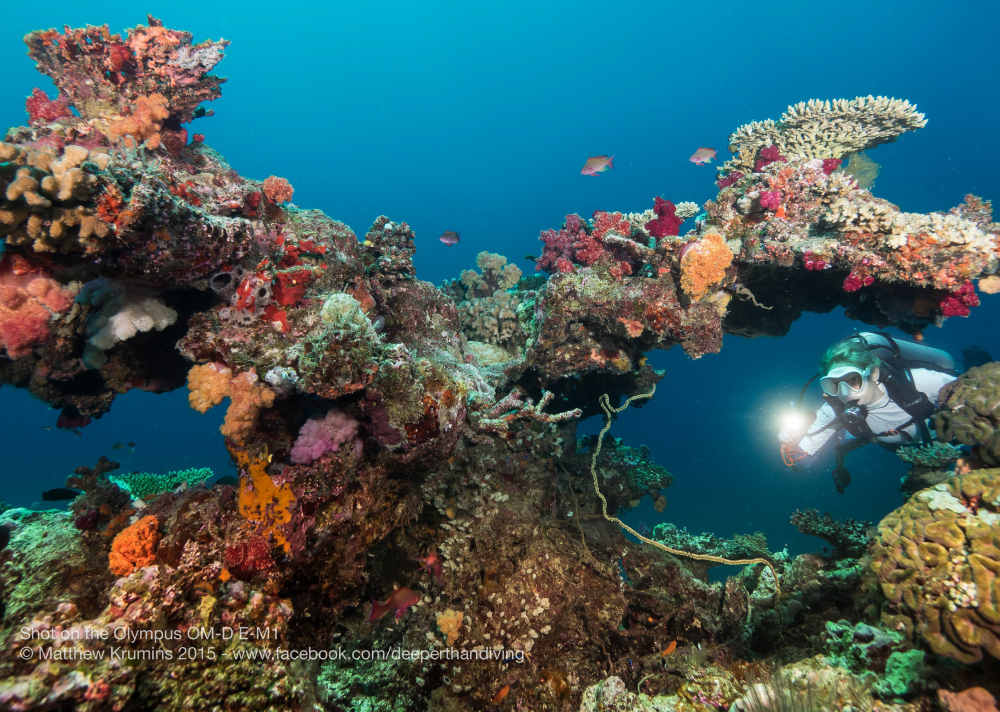
When we learn to dive we are inundated with safety procedures, finning technique, buoyancy exercises and a strict code of conduct regarding the critters we interact with on a dive.
These things also happen to be the first things that new underwater photographers forget as they fin across the reef creating small mushroom clouds of silt whilst chasing their subject in circles like crazed paparazzi. Diving techniques are actually at the heart of a brilliant photograph; the ability to hover motionless with a subject is absolutely critical in getting the right “look”.
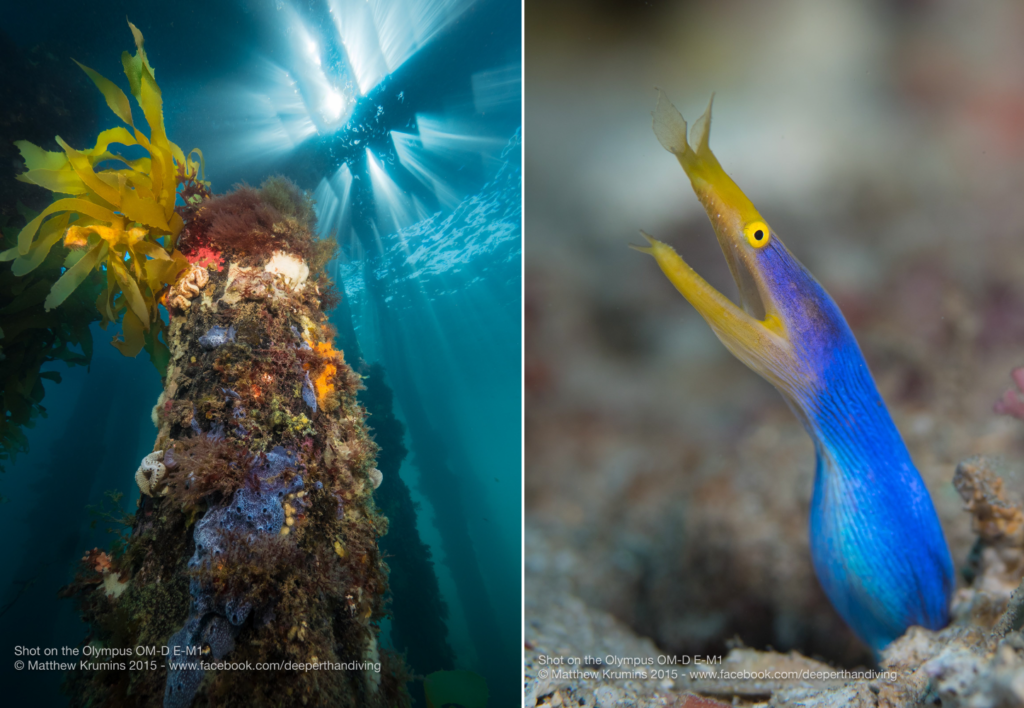
When I say “look” I’m referring to the images where the seashore is peering directly down the camera lens, or where the clownfish sits mouth open presenting a parasitic mollusc on it’s tongue or perhaps the flamboyant cuttlefish displaying it’s colours in perfect symmetry at the camera.
Poor buoyancy, chasing a critter and finning techniques that look more like an outtake from the Godzilla film lead to scared critters and scared critters generally leads to a poorly composed image.
All hope is not lost though as great buoyancy and finning technique comes at no cost other than your time and patience.
Practice diving with your camera switched off for the first 10 minutes of your dive; focus on the way your buoyancy is affected when you extend your arms out and move the camera closer or further way from your body.
As you change the pivot point of your buoyancy you will quickly realise just how much control your cameras weight affords you when floating motionless in the water.
I shoot with an Olympus mirrorless system and even though it is almost neutrally buoyant, this still has an impact on my balance.
This is also aided by another dive technique bestowed upon me by a fellow diver: always try and shoot into the current.
Simple really, the resistance of the current pushing against a slow gentle fin kick allows for significantly more control than trying to shoot against the current and as an additional bonus, if you accidentally cause a little sand cloud with your fins it will wash away from your shot, not into your scene.
Two birds with one stone.
Some people are born with an eye for brilliant composition and others need to develop it but one thing is definitely clear, your “eye” is essential when it comes to any kind of photography and underwater is no exception. Good composition is a balance between negative space, balance of the subject and the isolation of focal points to de-clutter a scene. As a general guide the “Rule of Thirds” is a composing tool that works every time and most cameras can be programmed to display this on the screen as a constant reminder, however the underwater environment is what I would consider to be beautifully chaotic.
Reefs sport all shapes and sizes of fish darting in and out of countless shapes of coral structures sometimes entangled in sea-grasses and kelp forests. The brilliant images we all aspire to, all have one thing in common: they simplify the chaos by separating the subject from it’s environment whilst maintaining environmental context.
This can be achieved through a shallow depth of field (where the subject is in focus but the background is blurry) or through lighting techniques, but also through the simple act of ensuring our scene has an element of physical depth.
When we look at pleasing portraits of people they are rarely hard up against complex backgrounds and fish are no different, the subject gets lost and there is a lack of story in the scene.
For this reason the most basic technique to improve your underwater photography is to always try and shoot “up” slightly towards the surface; get your subject against a blue water background and separate them from the chaos of the reef.
Without a single turn of a dial your images will dramatically improve, with more drama and impact giving your subject more underwater context and the blue water appearance that audiences have come to expect in underwater photographs.
Like magazines sporting flawless images of models with shrunken hips and skin smothered in photoshop, it is no secret that almost any image aspired to by a photographer has been in some way, shape or form manipulated or at very least processed from RAW. When it comes to getting back to the basics this doesn’t just apply to before the shoot.
Post production is as much an art-form as the initial capture of the image and is essential in getting images that stand out from the crowd.
But at times post production is sometimes mistaken to be doctoring or photoshopping.
When I talk post production and getting back to basics I’m not referring to the Smurf-like over saturation of blue water or the complete overhaul of an image.
I am talking about the small things that are become more frequently overlooked in favour of in-vogue editing.
I myself am guilty of “overcooking” an image and over time I have come to realise that before getting stuck into the details, the “back to basics” questions you need to ask are:
– Is this image worth my time editing?
– Do I need to correct the rotation or crop?
– Does my colour correction still look realistic?
– Are there any highly distracting backscatter particles I need to remove?
It is after these four questions that we can continue on and create our own post production style. All too often we forget to ask question 1 leaving galleries chock-full of average images that distract from our best works.
Photography is art and therefore there is no right way to go about it and no wrong way for your images to look but the above techniques will give you a good grounding to your process no matter what your images look or style.
It is all too often that we prioritise the details over the basics and whilst no-one will disagree that the right camera and settings are essential in shooting your dream image there can be no argument that the stepping back, focusing on our dive technique and simply paying attention to the angles we are shooting at can have more positive improvements than hours of tinkering with our settings.
When you visit a gallery or envisage your favourite photograph we don’t see “settings”, we are sucked into a scene, a set of circumstances, a story.
I would bet my money that some of the world’s most iconic images were shot in an automatic setting, but that’s ok because as Ansel Adams once said
“you don’t take a photograph, you make it”
and by getting back to basics you can have far more control over how you structure your own work.
WORDS and PICTURES by Mattew Krumins