


We will start to learn together the use of the very popular software Adobe Lightroom and how to use it for underwater photography.
Recent online surveys have shown that Adobe Lightroom is the most preferred software for photographers, be that just beginners, advanced shooters or professionals. The capability of Lightroom packing the most important features of organizing, optimizing workflow and editing images before or after the need to adjust fine details in more capable programs such as Photoshop.
With the use of digital cameras there are no limitations (depending on memory card sizes) to how many photos we can take underwater. Everyone soon realizes the amount of pictures we are taking is overwhelming and they need to be organized, edited and stored in the most efficient way.
Digital cameras with high mega-pixels shooting in RAW are creating large file sizes. The amount of space they take up is immense and the need to organize all those hundreds, or very soon thousands, of images needs to be organized, the ones not useful to be deleted, the rest ordered in a structure so we can simply find, edit and share them.
Adobe Lightroom is a very powerful assistant to every photographer and before we start to learn how to use it for underwater photography in future issues, I would like to start with the importance of using the correct software to import your photos to your computer and then to your preferred software.
Importance of using the correct software!
Photography is a time consuming hobby and as we all know, once the shooting has been done the post processing starts, called the digital darkroom.
It is a very rare issue that we get the PERFECT picture out of the camera without the need to process it…
The circumstances underwater are nearly never perfect and there might be some plankton floating in the water creating some dots, lighting conditions might create shadows or exposure differences, low light might require to shoot at higher ISO rates, thus creating noise in the image, which can be seen at the images below.
These imperfections require us to load the image into our preferred software and do some editing.
This is where everyone has their own personal preferences to which program to use. The most popular program is Adobe Lightroom for main editing, and where Lightroom is not enough Photoshop is used for the enhanced editing capabilities.
The simple basic use of programs like Lightroom is preferred to many others like for example Canon ImageBrowser, Nikon Capture NX-D, Sony Image Data Converter (IDC) or Olympus Viewer.
Surveys show as well they are not the most favorite image editing/workflow/post processing tools out there.
This is where the problem starts: If we do import RAW files from the camera or SD card directly into Lightroom, we do loose immense quality. The photos below were taken as RAW with a Nikon D800, Olympus OM-D EM-1, Sony NEX7, exported in same TIFF 16BIT format, Adobe RGB in camera settings, imported directly to Lightroom and exported as TIFF 16BIT, same photos imported into Nikon Capture NX-D, Olympus Viewer 3/Sony IDC and exported as TIFF 16BIT:
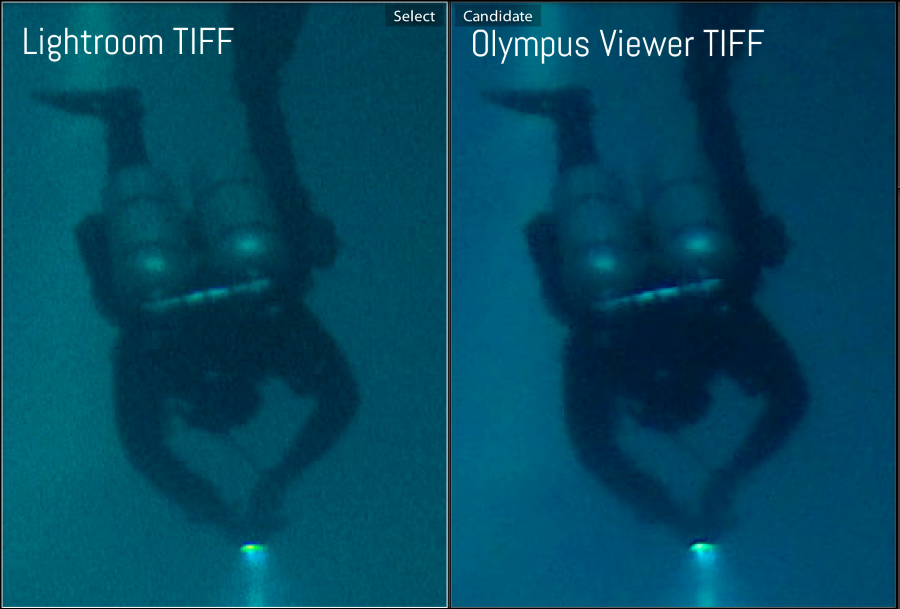
At first overall look at the images below we can see the color and noise differences between them.
This is zoomed in and the difference between 2 files becomes very obvious.
Loss in detail, color differences, higher noise.
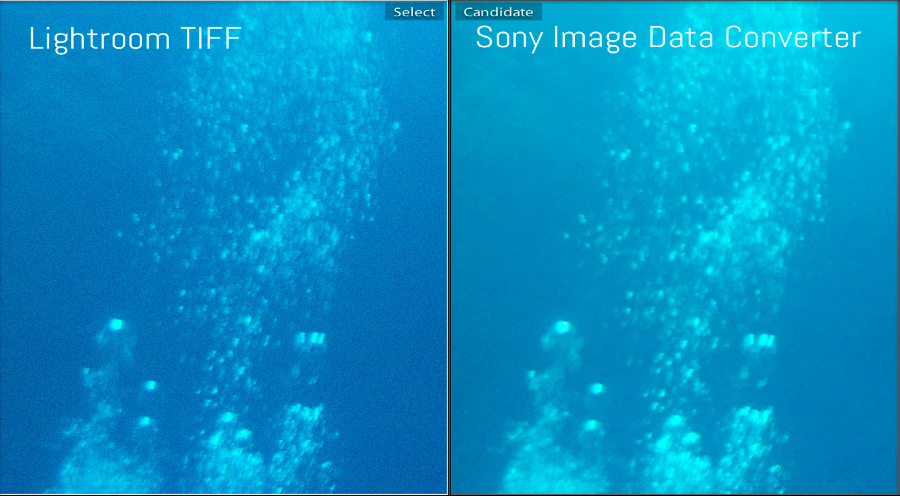
I have used these low light images specifically to show the drastic effect of noise while different software has been used.
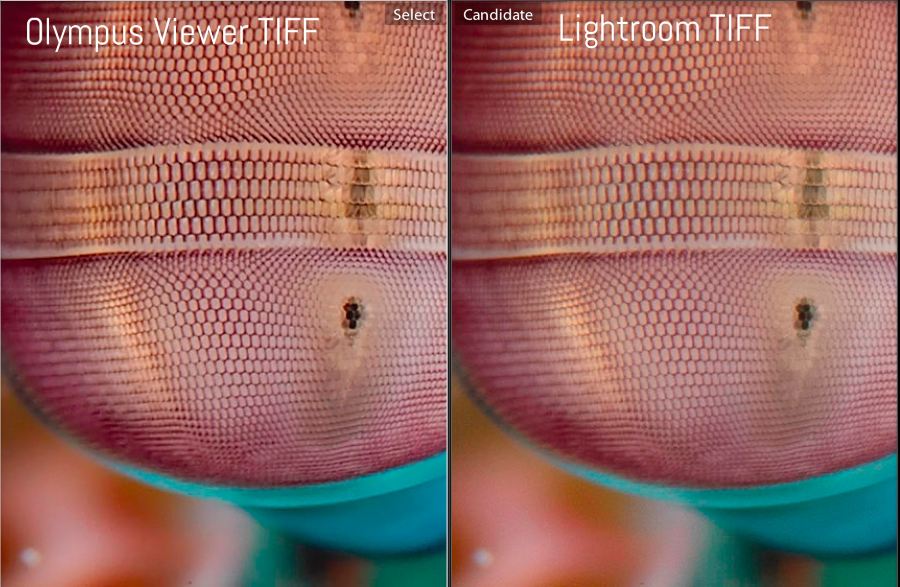
The photo below is an eye of a Mantis Shrimp, you can see that details, sharpness in the Lightroom Export TIFF are lost and also colors are much less vibrant and not represented across the whole color spectrum
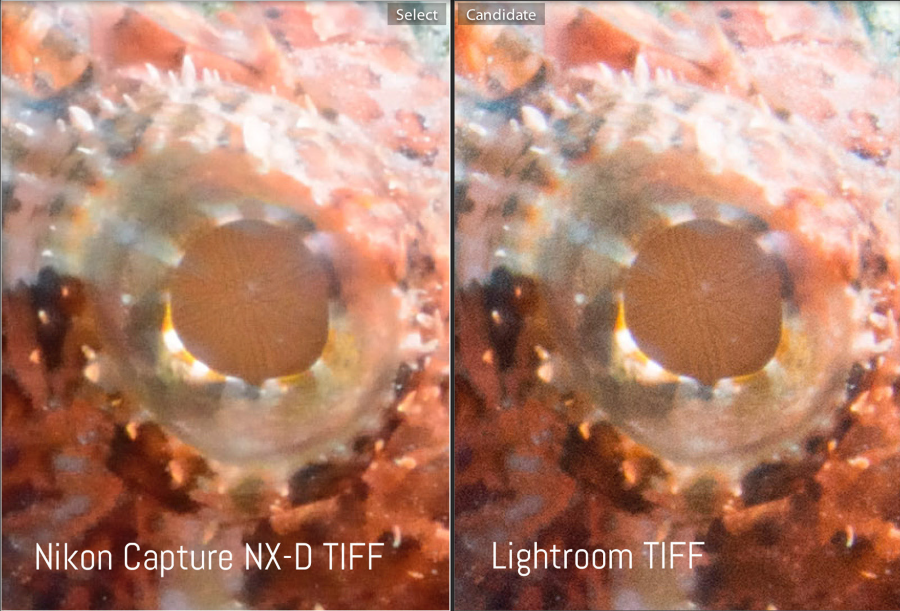
Photos created by the Nikon D800 boost a 36mp sensor and we can zoom in like into this stonefish eye to reveal details. As can be seen there is much more noise, less colors in the export by Lightroom.
Photos imported directly into Lightroom as RAW file and exported as TIFF are much noisier and have a huge amount of loss in detail. This might be not very important if you are just planning to show them online to your friends or display your photos on your website in resized versions. But if you have taken a really nice photo and would maybe like to order a poster or any large print out of it, this will become very visible in your images…
Every camera manufacturer’s software has its importance due to the fact that they know their cameras own software/hardware/lenses the best so they do apply this knowledge to import/export images out of the camera/sd card and create the best results…
If we still like to work in our preferred software such as Lightroom, we should firstly use the manufacturers own software to import the RAW file, export them as TIFF and then import them into the Lightroom Library where we can use the editing tools.
This way we make sure that minimum amount of detail gets lost and we do maximize the quality of photos from the camera we have just spend a nice amount of money on.
As a final word I would like to remind you that in our next issue we start learning the basics of photography and how to apply these basics in underwater photography.
In “Lightroom for Underwater Photography”: the use of the Lightroom Library and General Settings of Lightroom.
WORDS and PICTURES By Oktay Calisir
www.ocalisir.com


