


In advertising photography, before taking a picture you think about the positioning, power and color of the lights to use, either flash or continuous.
In underwater photography, thinking how to illuminate the scene in front of us does not happen: often the standard positions of the flash limit the photographers, with the frequent result of having the subject well lit, but illuminated flatly almost like a passport photo.
Willing to create the appropriate lighting to enhance the subject, first we should take off from our minds fixed flash positions, and study the subject to choose the best set up.
For sure, in wide-angle photography and using a fisheye, is almost mandatory using our flashes in a certain position to avoid their entering inside the frame. To the contrary, in macro photography we have the chance to go wild by positioning our strobes so to better value both the subject and its background.
For the maximum freedom, we might choose arms not too short, but also not too long. Two 25 cm sections jointed arms for each strobe are the best set up, in my opinion, since we may either distance or get very close with our lights, by extending or tightening the joints.
First, let us look into the different light sources:
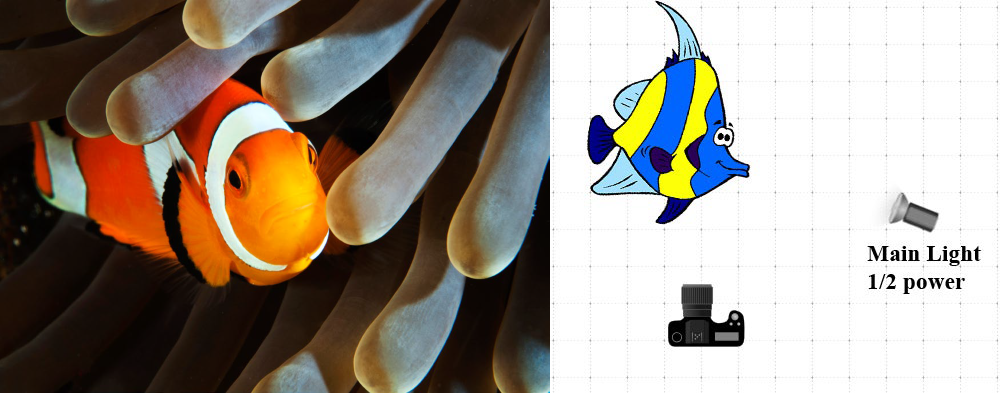
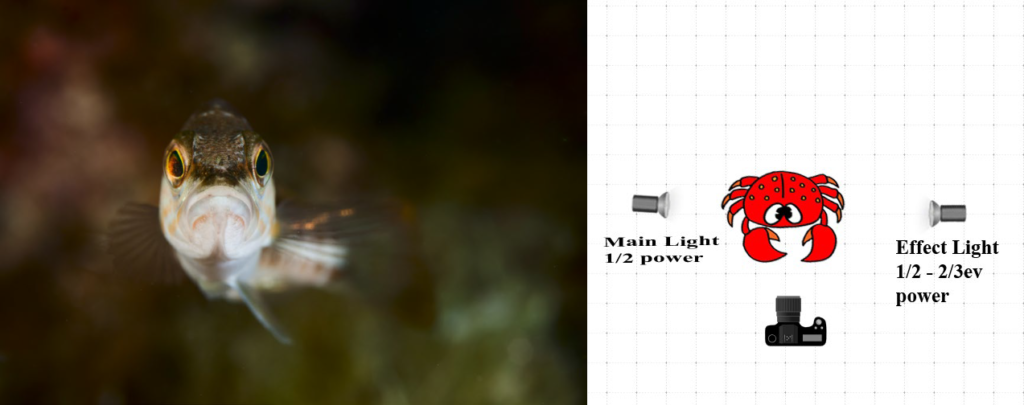
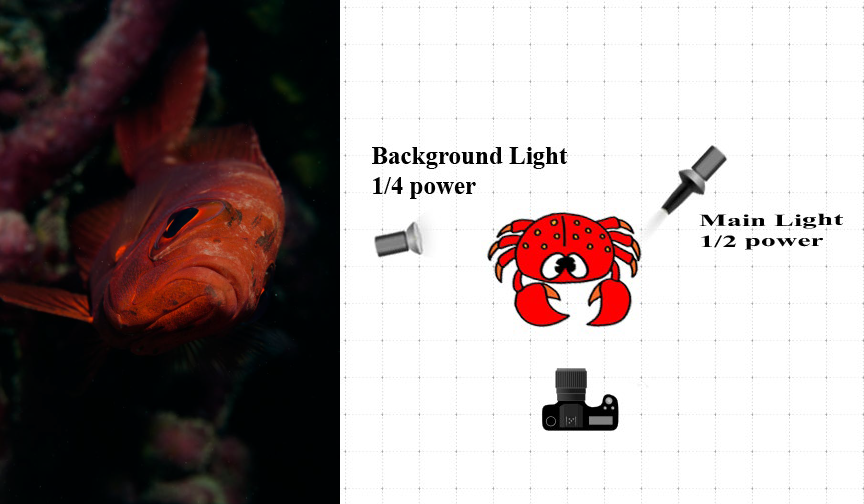
MAIN LIGHT:
Is the light we use to set exposure and shutter-speed. It should be the first source of light we think about both for position and power, being the one helping us planning and arranging the rest of our lights.

FILL LIGHT:
Serves to lighten the shadows produced by the main light. Usually, its power is slightly less than the main light (½ stop, max. 1 stop) since the same power will generate a flat lighting.
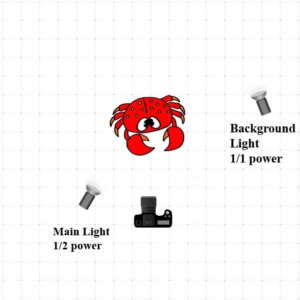
BACKGROUND:
We can both use the light to illuminate the background or use a backlit one.
To illuminate our background, we can either use our strobe or take advantage of the sunlight.
In macro photography, using ambient light to enlighten the background is more difficult, since we should use long shutter speed jeopardizing sharpness. The strobe, on the other hand, allows choosing faster shutter speed.
To the contrary, in wide-angle photography, taking advantage of the sunlight to illuminate the background and using ambient light is usually part of the light scheme.
Background light may be more rather than less powerful than the main light, but not as much as powerful: if this is the case, our picture will look flat.
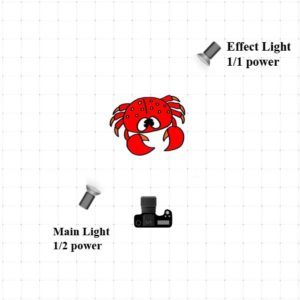
CONTRAST LIGHT
It is a light usually 1 stop stronger than the main light, to prevent unsightly burns.
Contrast light comes from behind the subject and helps highlighting it from the background. At the same time draws the profile of the subject itself.
For simplicity, we either should place this light at approximately 45° from behind, left or right the subject. We could also place our contrast light straight behind or above the subject, but avoiding framing the light through the lenses.
During the process of creating our mental lights scheme, we should remember that each light source produces a shadow on the other side; we might use this shadow to make our picture tridimensional, or to highlight the subject.
In addition to the flash, we can use the sunlight as a light source: for example, when we use the surface as background.
Background with shadows created by wavelets
Smoother background with fewer shadows
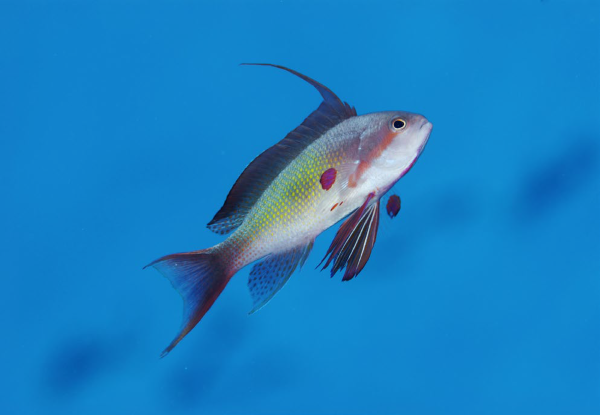
A single light source placed at 45° allowed drawing the shadows that created the illusion of the third dimension.
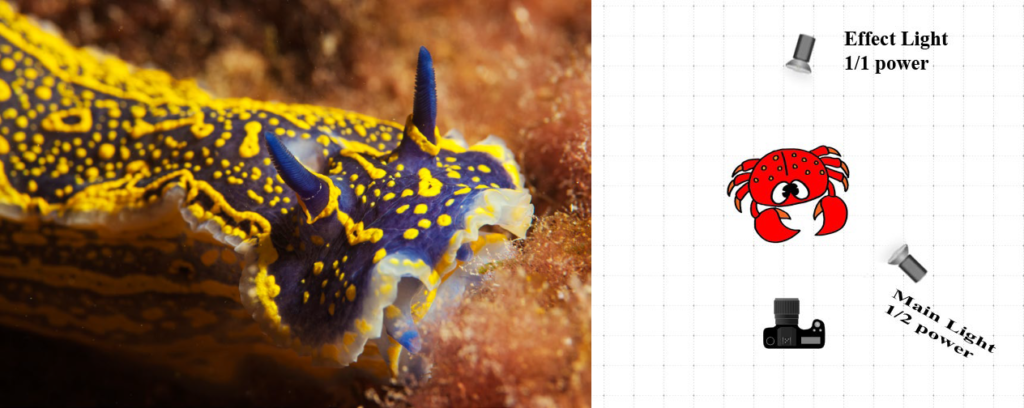
The main light illuminated the face and the left side of the animal, on the left of the picture, while the contrast light from behind, a bit stronger, allowed drawing the nudibranch’s outline, highlighting the subject from the background.
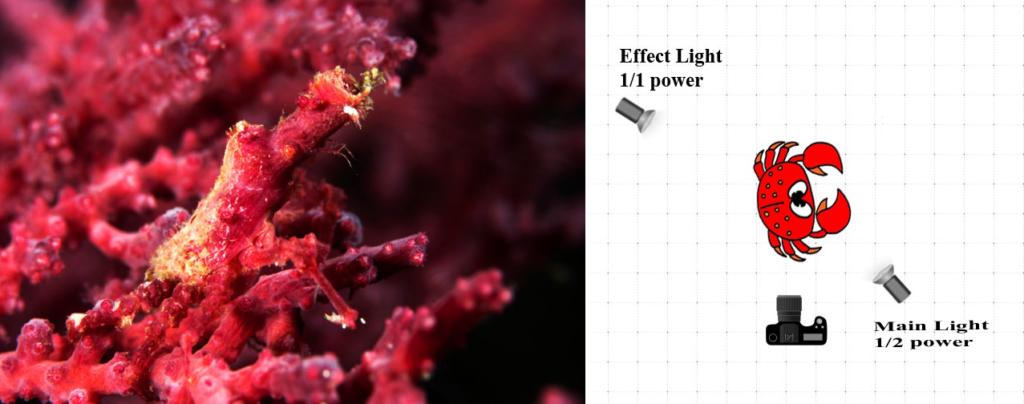
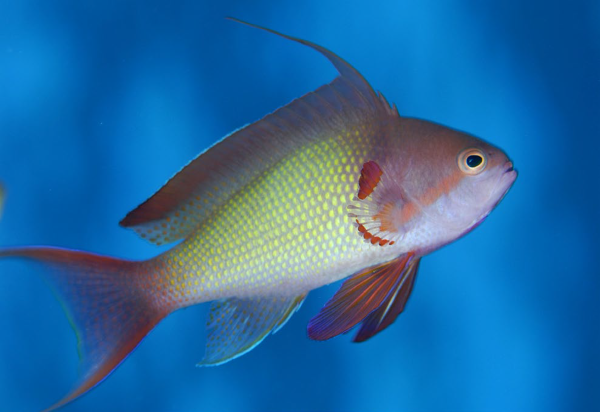
The main light illuminated the front of the animal and set exposure, while contrast light coming from the left and from behind allowed highlighting the subject, notwithstanding of the same color as the background
Using two strobes placed one in front of the other, with the subject in the middle, allows illuminating the subject from both sides, leaving the background illuminated next to nothing. If one of our flashes is slightly less powerful than the other, we could create some light shade allowing us giving three-dimensionality to the subject
Snoot can be the sole source of light, but also part of a lights scheme. In this photo, a light placed on the left partially lit the background while the main light, with snoot, from the right illuminated the fish face, creating a blade of light
WORDS and PICTURES by Cristian Umili and Alessia Comini


